


Virtual - various times
Virtual - various times
Virtual - various times
Virtual - various times
Virtual - various times
Virtual - various times
Virtual - various times


How To Make a Piñata at Home: Easy Paper Bag Piñatas

Piñatas are undeniably fun, no matter what you're celebrating. But buying one at a store can get expensive, and making one out of papier-mâché can be time-consuming (plus it's a recipe for a Pinterest fail). But we can tell you how to make a piñata out of materials you may already have at home—paper bag and tissue paper.
Whether you're planning a birthday party (these make great party activities for kids to take home as a non-traditional goody bag), a Halloween bash, or just a random weekend activity, paper bag piñatas are a great bang for your buck. We made ours in about an hour, and filled them with our favorite candy. My kids added googly eyes and sequins; your decorations are limited only by your imagination!
For more crafty fun, check out our list of 100 awesome art projects for kids and more crafting fun on our Guide to Boredom Busters for Kids.
OUR LATEST VIDEOS
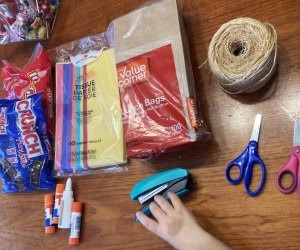
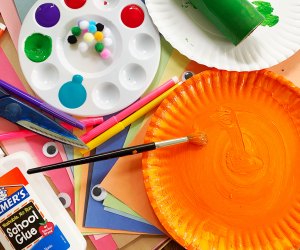
Check your school-supply stash before buying new materials to make your piñata.
Materials Needed to Make Paper Bag Piñatas
- Paper lunch or grocery bags
- Tissue paper (9-12 sheets per lunch bag)
- Glue sticks (Elmer's All-Purpose were the best for us)
- Stapler
- Hole punch
- Twine or yarn
- Candy!
How to Make a Piñata Out of a Paper Bag
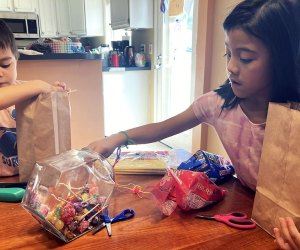
Start with the best part—the candy! Be sure to fill the bag only about halfway.
1. Fill the Bag About Halfway with Candy
Any more than that will make the piñata too heavy and too easy to break open, and any less will make it too difficult to break. Top off the bag with one or two crumpled sheets of tissue paper. Fold the top of the bag over by about an inch, they fold again and staple.
2. Wrap the Bottom of the Bag as you Would a Present
Cut a piece of tissue paper into quarters. Cover one quarter of the tissue paper with glue stick, then wrap the bottom third of the bag just like a gift, by folding the edges into triangles. You'll need to put a little more glue on the last part you fold over. If you have little kids, have them start on step three while you do this.
3. Fold and Cut Tissue-Paper Strips
Stack three or four sheets of tissue paper on top of each other (each of my kids picked three different colors to fold). Fold the stack once, twice, and three times in half so you end up with a long strip of paper about three to four inches wide. Then cut across the strip in two-inch segments so you end up with lots of 3.5-inch by 2-inch rectangles. Don't unfold the rectangles yet!
RELATED: 30 Easy Paper Crafts for Kids for an Arty Day at Home
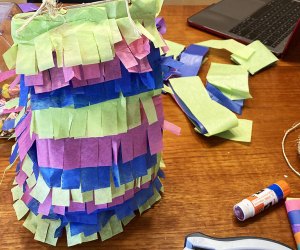
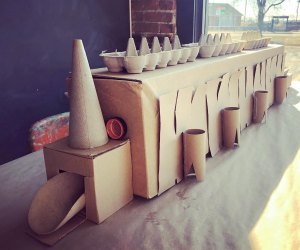
Fringe the tissue paper to give it that distinctive piñata-like look.
4. Fringe the Tissue-Paper Strips
Cut fringes about two-thirds of the way up each rectangle so that the top stays intact but the bottom becomes fringed (the fringe width is up to you). Then unfold the paper strips.
5. Glue the Fringes to the Bag
We found starting at the bottom was best so that the fringes covered up the flat part of the previous strip. Help little kids by holding down each strip of tissue while they spread the glue onto the strip. Then wrap the strip around the bag. Our lunch bags took about nine strips each, but you could go denser and use 10 or 12, or you might be able to get away with seven or eight if your kid gets bored.
RELATED: 20 Fun and Easy Toilet Paper Roll Crafts for Kids
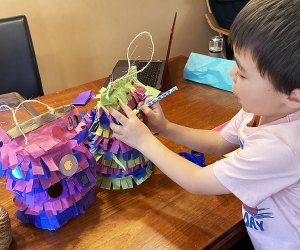
Add some twine and you'll be ready to string the piñata up.
6. Punch Holes in the Top of the Bag and String it Up
Punch through the folded part of the bag and use about a foot of twine or yarn to string up the piñata. You can also gently add googly eyes or other decorations.
7. Hang the Piñata and Bat it Until it Busts!
We had four kids ages 5-10, and each kid got about three turns before our piñatas finally busted open. One of our piñatas ripped open gradually, while the other burst open with candy flying everywhere. What your piñata does will depend on the strength of the final hit!
All photos by the author

